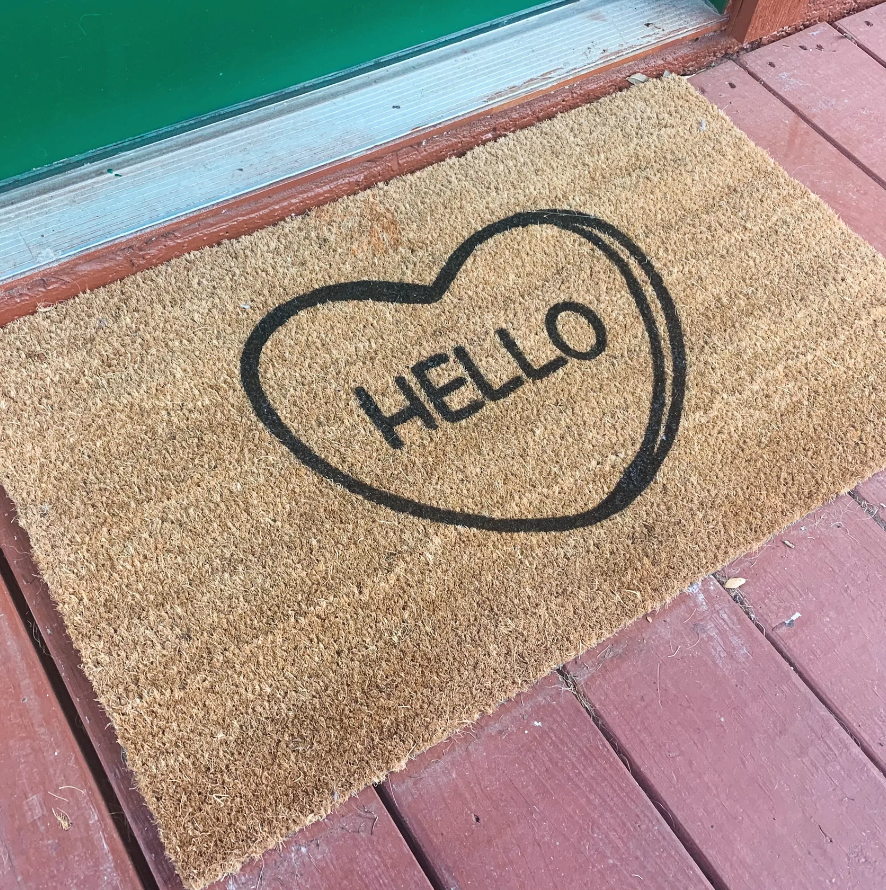
New year, new blog posts! I have lots up my sleeve for the blog this year, but the first post of the year is this super simple conversation heart doormat! I wanted a Valentine's themed doormat for our apartment, but couldn't find one I liked. So I just made one myself, and now you can make one too! This doormat is a 30-60 minute project, and will last for years if done with the correct supplies. There are two versions of tutorials; video and written instructions. Use whichever tutorial you prefer!
WHAT YOU'LL NEED
- conversation heart svg; click here to download -
- blank 18x30 inch doormat -
- adhesive vinyl, 12 x 16 inch piece -
- cricut (or similar) cutting machine -
- 12x24 inch cutting mat -
- duct tape -
- tweezers -
- black Krylon acrylic latex paint -
- 1 inch round brush -
- flex seal or similar sealant -
TIKTOK TUTORIAL
WRITTEN INSTRUCTIONS
First you'll need to cut out your conversation heart stencil onto adhesive vinyl. To do this, upload the svg into Cricut design space, then set the image to have a height of 11.5 inches. The width will adjust automatically. (If it doesn't, double check that the aspect ration is locked.) Once you have the design uploaded and sized, place your adhesive vinyl onto your cutting mat, load it up, then choose "vinyl" as your material. Now let your cutting machine work its magic!
Once your design is cut out, weed the lines from the heart and letters to create a large stencil. Next you'll need to transfer your vinyl onto the doormat; this is the hardest part! Go slow, and be careful. The last thing you want to do is waste a bunch of vinyl. You can use transfer tape for this step, but I've found that it's never really helped make it any easier.
My favorite way to make the transfer is by placing duct tape on one of the short edges, then slowly peel away the backing. As more adhesive is exposed, I press it down, and I continue this until the backing is completely removed. Since the vinyl doesn't completely stick to the doormat, it's easy to adjust and move it around if you didn't get the transfer completely right. Don't forget to place the other negative space pieces once you're done with the main transfer! (If you're confused by this explanation, watch the video at the top of this page.) Once you have your design placed, tape down the rest of the edges with duct tape.
Phew! Now you're done with the hard part; on to the fun part – painting! You can do this step with a small brush, but you'll get the best results if you use a brush that's slightly bigger than any of the lines on your stencil. For this project, I used a 1 inch round brush from Lowe's, and it worked perfect! You'll want to fill in all the spaces of your stencil using a dabbing motion and lots of pressure. (The dabbing motion is very important! This prevents any paint from getting under your stencil.)
Once you're done with your first layer, allow it to dry for 10-15 minutes, then do a second coat if needed. Allow it to dry for 10-15 minutes more, then remove your stencil. If you want to avoid getting your fingers covered in paint, remove the smaller pieces by using tweezers or something similar. Use a small brush to make touch ups if needed.
Once you're done with that, allow your doormat to air dry for 12-24 hours, then spray it with an outdoor sealant. Personally, I use clear flex seal in the aerosol can, but any outdoor sealant will do. After that, all that's left to do it place it on your front porch! Viola – brand new doormat. :-)

